

From Wrinkled to Refined: How Pressing Completes the Dry Cleaning Process
Table of Contents
You've spent ten minutes battling one stubborn collar crease, only to watch it reappear. Yet when you pick up that same shirt from the cleaner, every seam looks sharp and the fabric holds its shape. Cleaner fabric is only half the result. Dry cleaning also relies on skilled pressing, and much of the craft happens during that final stage.
So, here is the dry cleaning process explained from behind the finishing counter, where steam, pressure, specialized equipment, and a trained eye shape each garment, along with the details worth checking at your next pickup.
The Difference Between Home Ironing and Professional Pressing
A home iron heats and flattens fabric against one board. You supply the pressure, select the temperature, and maneuver around seams, curves, and buttons. That works for broad shirt panels but struggles to rebuild a collar, sleeve, lapel, or jacket shoulder.
Professional pressing combines steam, controlled pressure, and equipment shaped for specific garment areas:
- Surface: a home iron uses one flat board. Professional pressing uses curved bucks and specialized presses.
- Pressure: a home iron varies with your hand. Professional pressing applies evenly across the treatment area.
- Steam: a home iron gives light, manually directed output. Professional pressing uses controlled moisture that relaxes fibers before shaping.
- Structure: a home iron smooths visible fabric. Professional pressing shapes seams, collars, sleeves, and layered sections.
- Finish: a home iron can lose definition quickly. Professional pressing holds cleaner lines throughout normal wear.
Flat Surface vs. Form-Fitted Equipment: Why It Changes the Result
Your jacket shoulder contains curves, padding, interfacing, lining, and constructed seams. A flat iron may smooth the outer fabric, but it can also compress the shape built into the garment.
A professional finisher uses three coordinated steps:
- Relax the fibers. Steam softens wrinkles and makes the fabric easier to shape without excessive direct heat.
- Support the garment. A curved buck sits inside the shoulder, sleeve, collar, or another shaped area.
- Set the structure. Even pressure guides the fabric around the form. Suction then removes moisture and helps the shape cool in place.
Each machine handles a different section. Sleeve forms preserve a natural cylinder and align seams. Utility presses smooth shirt backs and trouser panels. Hand tools refine pleats, edges, and hard-to-reach details.
A professionally pressed jacket hangs with cleaner lines and retains its intended silhouette. Your cleaner does more than remove wrinkles. They reshape each section so the entire garment looks balanced, crisp, and ready to wear.
Stage 1: Post-Cleaning Inspection Before Any Pressing Begins
Before your garment reaches the press, a technician examines it under bright light for:
- Remaining stains or residue.
- Loose seams or stitching.
- Damaged or unsecured buttons.
- Fabric areas that need extra attention.
This inspection protects the final result. Heat and pressure can set leftover residue deeper into the fibers, making the spot harder to remove.
If the technician finds a problem, they return the garment for targeted stain treatment or minor repairs. Only after it passes inspection does pressing begin. This ensures your clothing receives a crisp finish without sealing in preventable flaws.
Stage 2: Hand-Finishing of Delicate Embellishments and Detail Areas
Not every garment detail belongs under machine pressure. Technicians hand-finish areas requiring precision:
- Beading, sequins, and embroidery.
- Lace and decorative trim.
- Hand-set pleats.
- Collar undersides and cuff interiors.
- Fitted seams on dresses and formalwear.
Using a small iron or handheld steamer, the technician controls heat, moisture, and pressure around each detail. This approach smooths fabric without flattening embellishments, scorching trim, or melting heat-sensitive decorations.
Hand-finishing also reaches areas standard presses cannot. The slower, focused process gives your garment a polished finish while preserving its distinctive details.
Stage 3: Form-Pressing on Chest, Body, and Sleeve Forms
Here, your jacket, dress, or coat regains its intended shape. A technician places it over a padded body, chest, or sleeve form. The equipment then follows four steps:
- Position: the form supports curves, lapels, shoulders, and sleeves from inside.
- Steam: heat and moisture relax wrinkles and make the fibers pliable.
- Press: controlled pressure smooths the outside while the form preserves structure.
- Cool: airflow removes moisture and sets the shape before removal.
Cooling matters. Removing a garment while it remains warm and damp allows the fabric to lose definition quickly.
How Steam and Pressure Reshape Fabric to Hang the Way a Garment Should Hang
Fabric fibers, especially wool and cotton, respond much like hair. Heat and moisture make them easier to reshape. Cooling them on the form helps preserve their new position.
Professional equipment delivers steam, pressure, and support more consistently than a home iron. It supports the garment's curves and inner construction while treating the outer fabric. A flat ironing board cannot provide that three-dimensional foundation.
The finished garment does more than look wrinkle-free:
- Shoulders regain cleaner definition.
- Sleeves hang naturally without flattened seams.
- Lapels sit neatly against the chest.
- Body panels fall in smoother, balanced lines.
This process explains why professional pressing often stays crisp throughout your workday, while a home-ironed finish may soften much sooner.
Stage 4: Collar and Cuff Presses Home Irons Can't Match
Collars and cuffs endure folding and rubbing, so they lose definition quickly. A home iron can smooth them, but its flat surface and hand-applied pressure make consistent results difficult.
Dedicated presses combine:
- Shaped surfaces that support each section.
- Controlled steam that relaxes the fibers.
- Even pressure across fabric layers.
- Precise timing that protects the material.
A technician aligns the collar points, cuff edges, seams, and buttons. The machine then sets an even finish without crushing the shirt's construction.
You receive a collar that lays flat, points that resist curling, and cuffs with clean edges. This definition creates the crisp appearance you notice when a finished shirt returns on the hanger.
Stage 5: Final Quality Inspection and Hanging
Before your garment leaves the finishing area, a technician checks:
- Matching collar points and even cuffs.
- Straight seams and intentional creases.
- No unwanted shine or press marks.
- Secure buttons and smooth closures.
- A balanced overall shape.
They correct any uneven areas before hanging.
Next, they place your clothing on a hanger suited to its construction. Jackets and coats receive shaped hangers that support the shoulders, while shirts receive hangers that help preserve their clean lines.
This final step protects the professional finish during storage and transport. Your garment reaches you crisp, properly shaped, and ready to wear, not creased or collapsed before pickup.
How to Tell a Quality Press From a Rushed Job at Pickup
You don't need any training to spot the difference. Check these the moment you pick up your garment:
- Collar and cuff edges are sharp, not soft or rounded.
- Shoulder seams sit flat and follow your body's curve, no puckering.
- The garment drapes cleanly on the hanger, no stiffness or awkward hang.
- No shiny patches where an iron plate sat too long.
- No crease lines running somewhere they shouldn't, such as across a sleeve.
- Pleats and details look reset, not just steamed flat.
Start at the collar. A rushed press shows up there first. Soft or slightly curled points usually mean a shop skipped the dedicated collar press or rushed your garment through.
How to Preserve the Finished Press Between Cleanings
A press doesn't last forever, and how you handle your garment afterward decides how long. A few habits protect it:
- Use shoulder-shaped hangers for jackets and coats, never wire.
- Store formalwear in breathable garment bags, not sealed plastic, which traps moisture.
- Give your clothes room in the closet so they aren't compressed against each other.
- Let a garment rest a day after wearing before you hang it back up, so moisture from wear can release.
- Avoid sitting for long stretches in pressed trousers or a jacket right before an event.
None of this replaces a fresh press. It just stretches the life of the one you already have.
Get the Crisp, Finished Look Professional Pressing Is Meant to Deliver – Visit Marberry Cleaners and Launderers
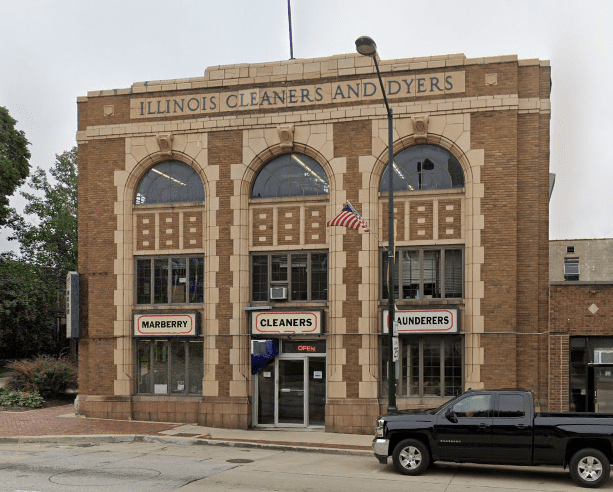
Never had a garment finished on shaped, professional equipment? Bring one dress shirt or blazer to Marberry Cleaners and Launderers in St. Charles, Illinois and see the difference for yourself against whatever your iron at home can manage. Most first-time customers searching for real dry cleaning are surprised by how much sharper a hand-finished, professionally pressed garment looks compared to what they've been doing on their own.
Drop off a first piece this week as a test, or ask us about weekly shirt service if you're ready to make it a habit.
Address: 315 E. Main St., St. Charles, IL, 60174
Phone: (630) 280-3143
Related Articles from the same category:



Copyright © 2026 All Rights Reserved.
Designed by Cleaner Marketing